 I stood there in terror, my hands up ready to cover my eyes, watching for the tiniest slip or jerky movement. Five of our photography team assistants were moving a 200-pound, 8×4 foot relief model from a table top to the floor, about 3 feet. We needed to photograph it face-on and there was no other way than to set it on its edge on the ground.
This was during our first attempt at photographing all the relief models in Science Hall, an all-day affair on 11 February 2012. The work was being performed for my future book and also, I felt, as documentation of these historic models at UW. Tim Hughes and crew had shown up at Science Hall on a Saturday with permission of the Geography Department. We had several helpers. Larry Chua was assisting Tim Hughes. Special equipment, a custom stair riser, had been built by Randy Topp.
Read more about the photography process in my book …
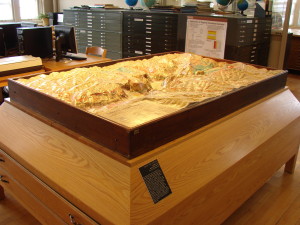
We walked into the map library and looking at Yosemite on the tabletop Tim immediately said, uh-oh, this is tough. The model was displayed the way that it was designed to be: on a tabletop, close up and at arm’s length. But Tim needed to photograph this one face-on with special lighting from about 6-8 feet away or more. Unless Tim wanted to levitate on a rope like Tom Cruise above the model, we’d have to do something else.

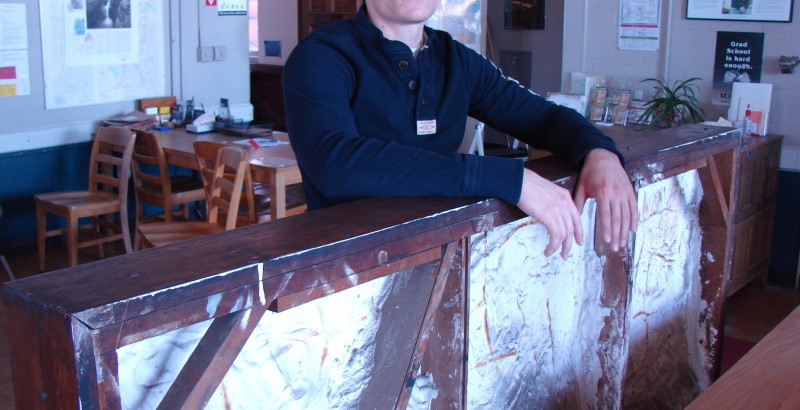
After considerable discussion and agonizing, I agreed to let the model be set onto the floor so Tim could capture it. Hence the terror. Any slip of the grip and an irreplaceable historic artifact would get cracked, split, or broken. I’d rather put my car into the lake than harm one of these models. So with the greatest carefulness and slowness, we slid the model until it was about one-third way sticking out from the table and then slowly lifted up and rotated it down to the floor…with me standing there yelping, BEEE CAREFULLL DON’T TWIST IT, and everyone yelling and grunting back WE ARE, WE ARE!!! they it finally got it into a standing position on its edge on the floor by the table.
One assistant, a military veteran who could lift a car, kept the model stable against his whole body. Once it was down, the 8-inch wide frame basically could have kept it stable. But anytime he would start to move , I would make faces like it was falling off the capitol building. So he just stayed very still until all the equipment was set up.
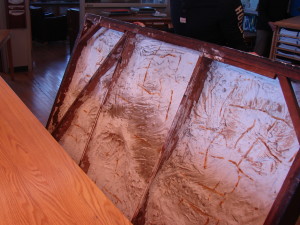
I took this photograph and took more close-ups the back of the relief model while it was held. What the model revealed is the superior casting technique of Edwin E. Howell’s shop, and the materials that he used to stabilize such a large model. It also confirmed my partial knowledge that Howell, on very large maps, built a wooden frame (stringers) through the heaviest parts and attached a light terrain armature on top that would be covered with plaster, giving it a superior stable base that was extremely resistant to cracking when so large. Howell then during casting then laid a net of wire between the stringers and the plaster was scooped out with the hands to be light and to follow the negative terrain as much as possible.

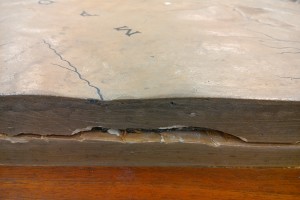
Library of Congress relief model “Yellowstone National Park” detail showing the armature-and-wire base that made a Howell relief model so stable though the years. Photo by Melanie, 2015.
This year (2015) when I went to the Library of Congress I was able to get a close look at another model of similar vintage and see the side-view of the armature-plaster-wire method. The photo here is of the Yellowstone National Park model. From bottom, the model finished frame (wood) then the model base armature of wood (you can see the chisel marks about 1-inch wide that carved the armature. It was covered by painted plaster on the side. Then the main plaster cast, painted with the map theme (brown with black creek showing). The wire and wood show all around in the model through this crack as evidently the whole model (at one time) was either twisted or dropped on its frame, creating the crack that separated armature from plaster top.
It’s putting together these little details that is satisfying, as they point out the innovations and forethought that Howell put into his models.
